It has considerable heft to withstand the rigours of the classroom. We measured the base
unit at 100×130×35mm and weighed it in at 397g.The GPIO sockets (with BCM numbering) break out to the top of the case alongside a small
120×64 OLED display and four control buttons, a built-in battery, and a speaker. You gain a second USB-C port for the upcoming pi-top Bluetooth Keyboard and FHD Touch
Display. Which promises to transform pi-top [4] into a touchscreen laptop.
Battery and screen
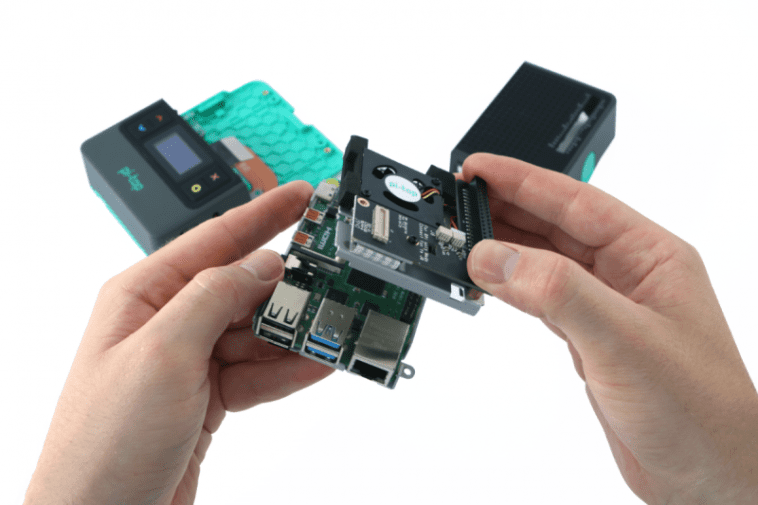
![Add your own Raspberry Pi 4 to the pi-top [4] DIY Edition](https://images.ctfassets.net/tvfg2m04ppj4/5gSBgP5HKKxKmkrsB4rYvE/ef90627c280cea83903391b7c7071765/PT_-4-_DIYEdition_Assembly.png)
It’s the only case we’ve seen that contains a built-in battery and display. Making pi-top [4]
good for mobile use and also acts as power redundancy. It takes around an hour to charge
and lasts for around five hours of use. The small 128×64 OLED displays information on the battery level, CPU load, and network
connection. We were glad to discover an OLED and Button API in the documentation. The ‘ptoled’ module enables you to draw text, images and GIFs to the display, and plot and draw shapes.
Built-in cooling

pi-top [4] includes a fan that automatically adjusts its speed according to the CPU
temperature. We tested it with Stressberry and found that pi-top [4] idled at 35°C, maxing out under stress at 45°C (with an ambient temperature of 14°C). We overclocked it and ran pi-top [4] at 2GHz and the temperature maxed out at 56°c. At all
times the fan remained at a constant low non-intrusive spin, with speed controlled by the pi-top Hub. Reconnecting the fan to a second jumper enables manual control.
Installation

Installing Raspberry Pi inside pi-top [4] took around five minutes. Wil Bennett, pi-top’s
director of technology, has a YouTube video that walks you through the installation process. pi-topOS Solaris is a feature-packed operating system built on top of Raspberry Pi OS (32-
bit) ‘Buster’. It’s possible to use stock Raspberry Pi OS and control the pi-top hardware. We used this script:
echo "deb http://apt.pi-top.com/pi-top-os sirius main contrib non-free" | sudo tee /etc/apt/sources.list.d/pi-top.list &> /dev/null curl https://apt.pi-top.com/pt-apt.asc | sudo apt-key add sudo apt update sudo apt install --no-install-recommends -y pt-device-manager pt-sys-oled pt-firmware-updater sudo rebootWe had to install a firmware update to get the stock Raspberry Pi OS working; pi-top
assures us the final version will ship with the firmware installed. On the whole, we really like pi-top [4]. A lot more than we expected. The price remains a
hurdle, costing four times more than the Argon One. However, it has a range of unique features that make a compelling case for the additional cost and there’s no arguing with the build quality.