Inspired by an old episode of Pimoroni’s Bilge Tank, and with easy access to the laser cutter at the Raspberry Pi Foundation office, I thought it would be fun to create a light-up multi-layered hologram using a Raspberry Pi and the Pimoroni Unicorn pHAT.
Raspberry Pi layered light
Read more –
– Werbung –– Werbung –
Break it to make it
First, I broke down the Raspberry Pi logo into three separate images — the black outline, the green leaves, and the red berry.
Fun fact: did you know that Pimoroni’s Paul Beech designed this logo as part of the ‘design us a logo’ contest we ran all the way back in August 2011?
Once I had the three separate files, I laser-engraved them onto 4cm-wide pieces of 3mm-thick clear acrylic. As there are four lines of LEDs on the Unicorn pHAT, I cut the fourth piece to illuminate the background.

To keep the engraved acrylic pieces together, I cut out a pair of acrylic brackets (see above) with four 3mm indentations. Then, after a bit of fiddling with the Unicorn pHAT library, I was able to light the pHAT’s rows of LEDs in white, red, green, and white.
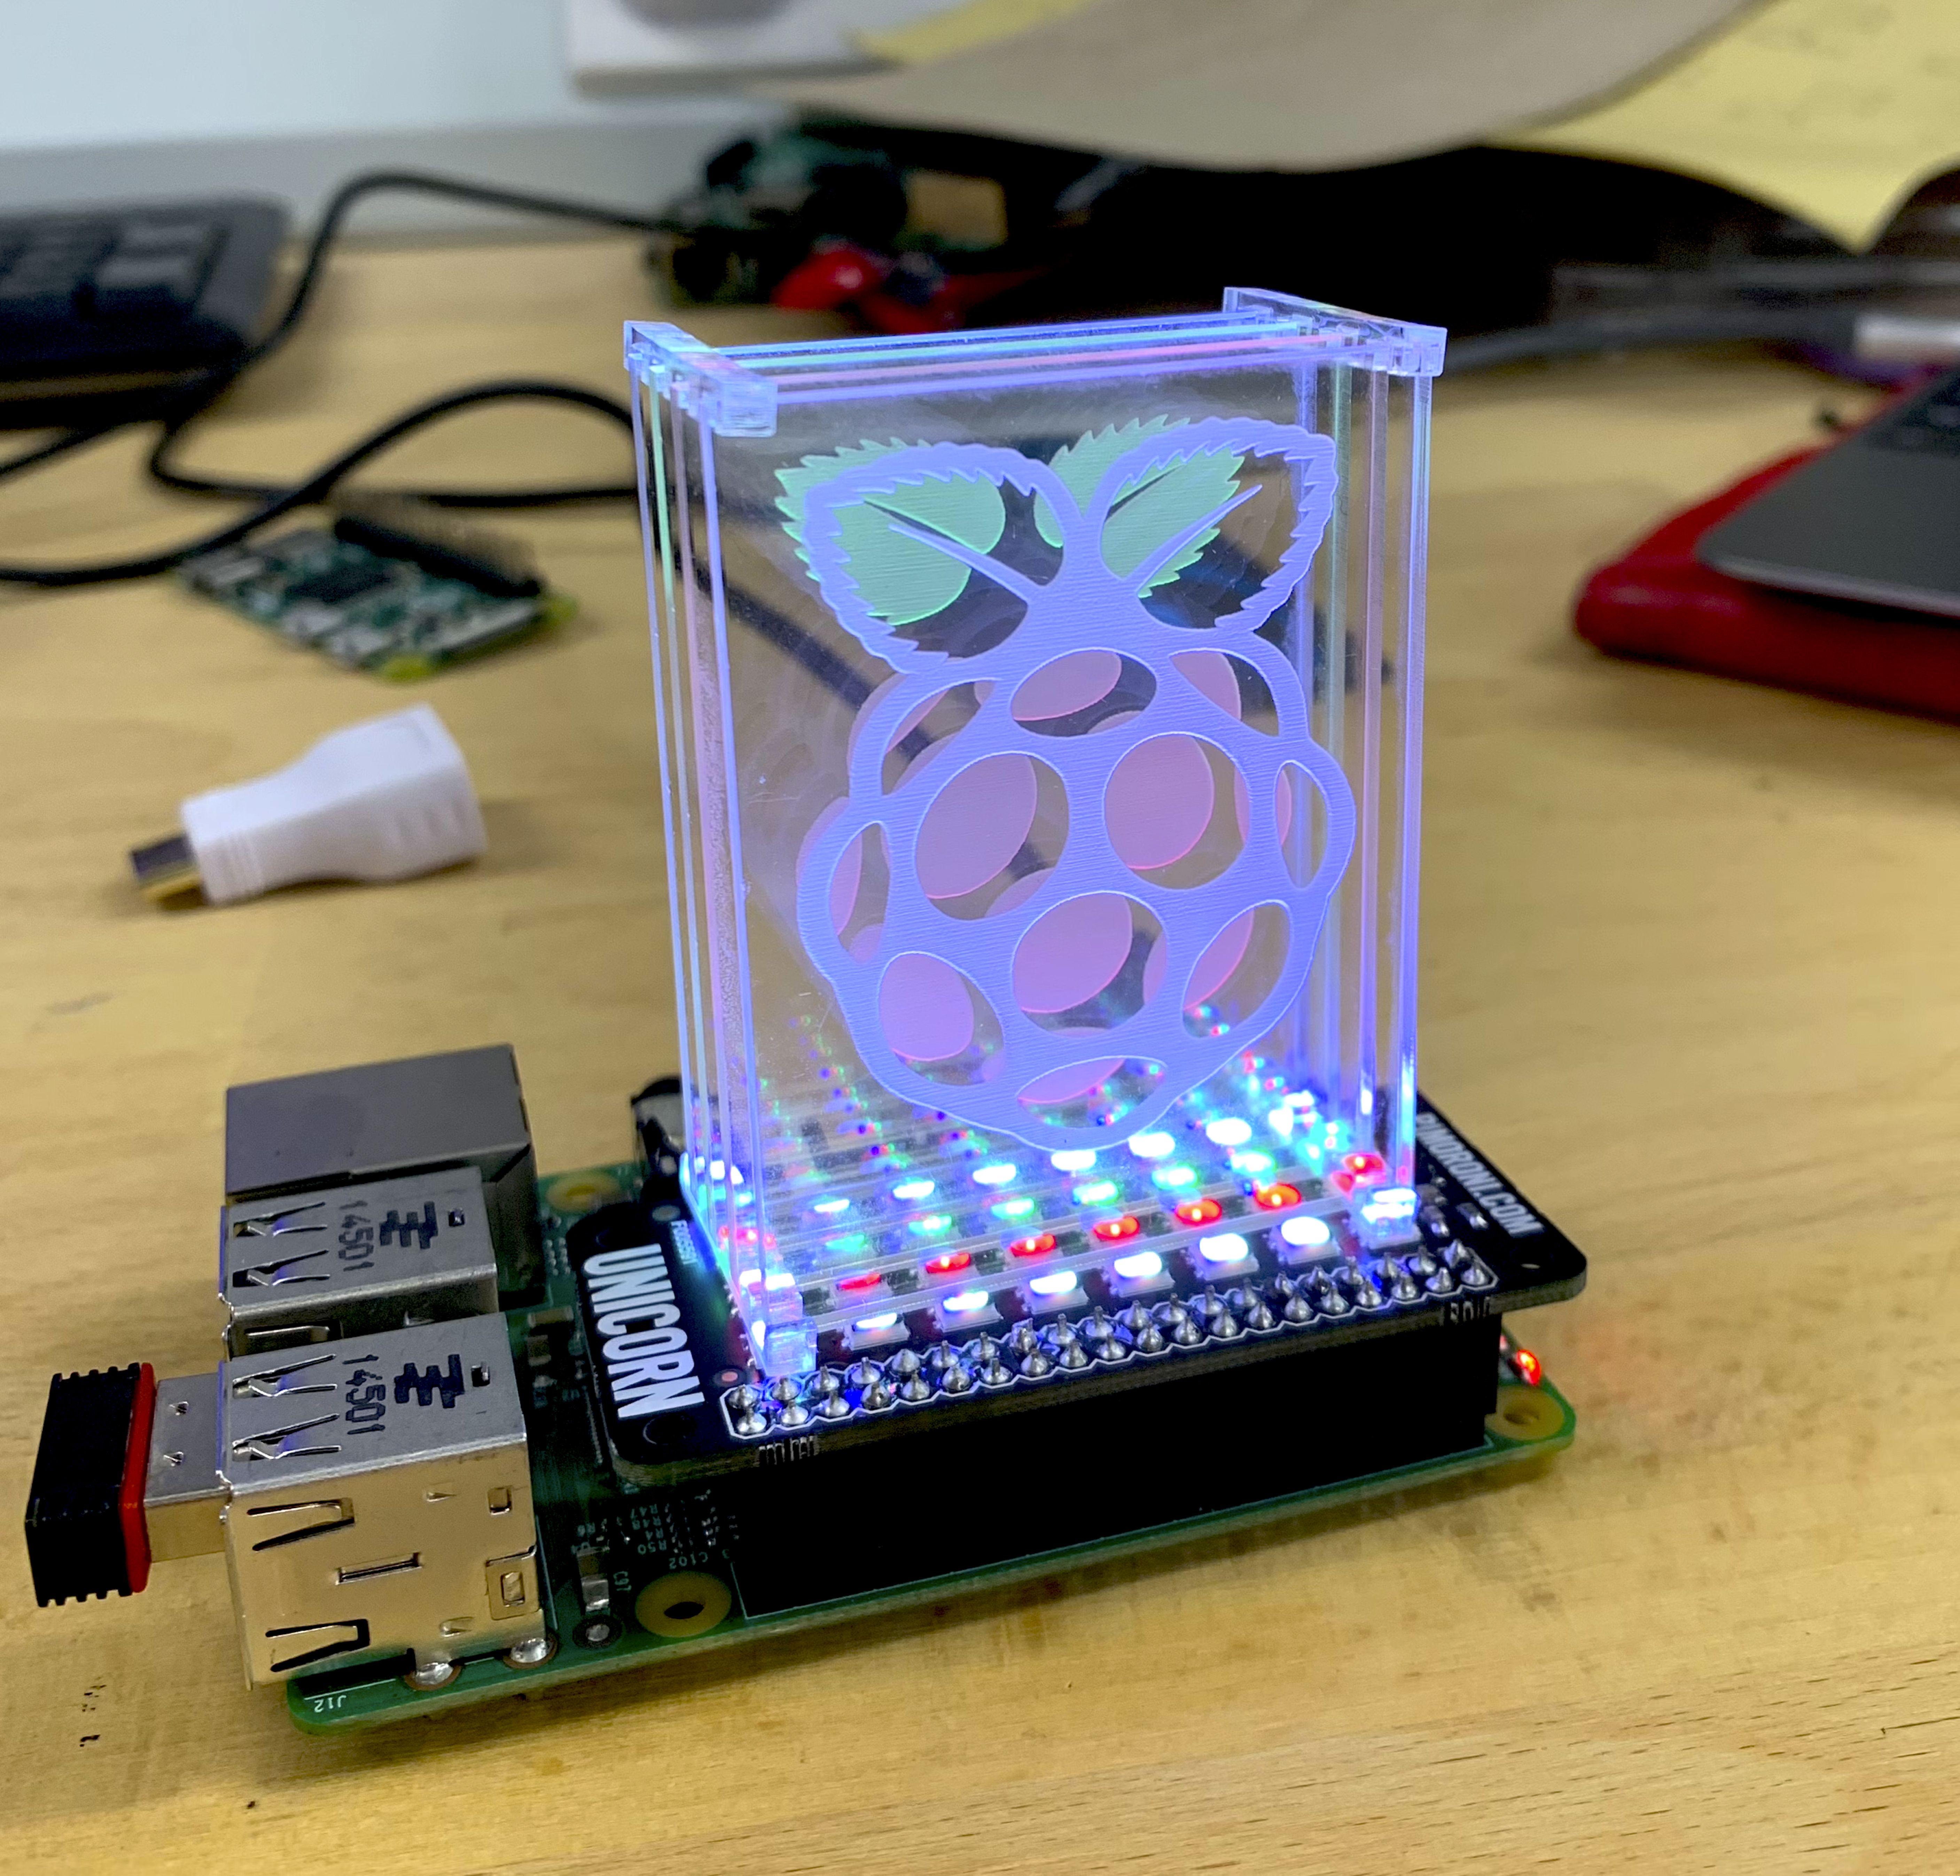
The final result looks pretty spectacular, especially in the dark, and you can build on this basic idea to create fun animations — especially if you use a HAT with more rows of LEDs.
Iterations
This is just a prototype. I plan on building a sturdier frame for the pieces that securely fits a Raspberry Pi Zero W and lets users replace layers easily. As with many projects, I’m sure this will grow and grow as each interaction inspires a new add-on.
How would you build upon this basic principle?
Oh…
…we also laser-engraved this Cadbury’s Creme Egg.

Website: LINK
Schreibe einen Kommentar
Du musst angemeldet sein, um einen Kommentar abzugeben.