It’s been a journey, but it’s finally here, and I can talk about the secret Raspberry Pi 400 project! I’ll also try to cover some of the questions you asked following Eben’s announcement of Raspberry Pi 400 yesterday.
Four years in the making
It’s been over four years since the original idea of a Raspberry Pi inside a keyboard was discussed, before I even started working at Raspberry Pi Towers. Initially, the plan was for a kit with all the parts needed for people simply to open the box and get started by connecting the accessories to a “classic” credit-card sized Raspberry Pi. The challenge was that we needed a mouse and a keyboard: if we could manufacture a mouse and a keyboard, we could make a complete kit. How hard could it be? Then, within a day of our announcing our new keyboard and mouse, we saw a blog from someone who had milled out the keyboard and integrated a Raspberry Pi 3 Model A+ into it.
Our jaws dropped – we were impressed but we couldn’t say a word. Then others did the same with a Raspberry Pi Zero, and by that point we kind of expected that. We knew it was a good idea.
The keyboard and mouse were the big things we needed to sort out: once the quality control and supply chain were in place for those, we could move to fitting keyboard matrices to Raspberry Pi 400s, and achieve final assembly in Sony’s manufacturing facility in Wales. We had first planned to make a Raspberry Pi 3-based version, but it was clear that getting such a complex item into product wouldn’t happen until after we’d launched Raspberry Pi 4, and this would make the new product seem like a runner-up. So, instead, we started work on the Raspberry Pi 4-based version as soon as the design for that was finalised.
A fresh, new Raspberry Pi 4
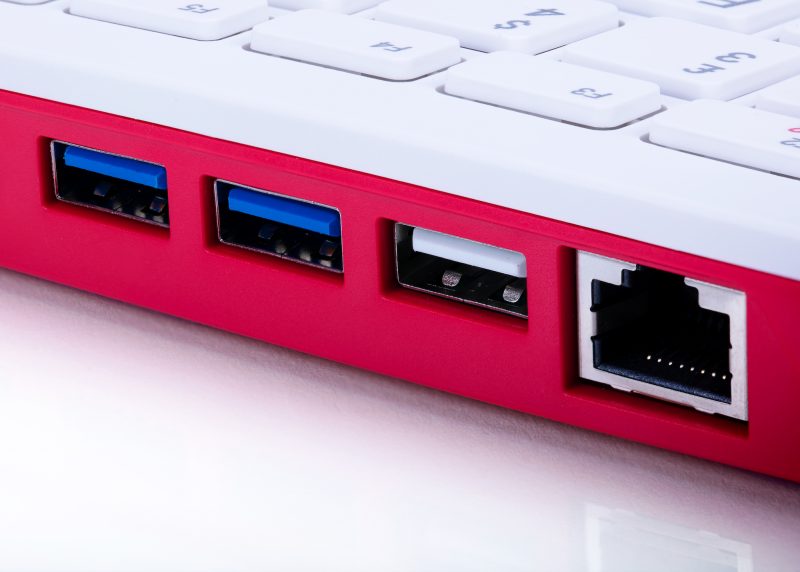
The board inside the housing is essentially a Raspberry Pi 4 unit, but with a fresh PCB design. It has the same USB and Ethernet system as the Raspberry Pi 4, but one of the USB2.0 ports is dedicated to the keyboard.
Left-handed?
We have already seen a few comments about the USB ports being on the left side of the unit, and the fact that this makes the mouse cable cross over for most right-handed users. The PCB shape had to be defined early on so that the industrial designers could get on with the housing design, and I then stared endlessly at the PCB layout, trying to get one of the USB ports to route to the right side without wrecking the signal integrity of the memory or the HDMI; I could not find a way to do this. Left-handed folks and Bluetooth mouse-owners will be happy at least!
Micro HDMI
Raspberry Pi 400 has dual-band 802.11b/g/n/ac wireless LAN and Bluetooth 5.0. Like Raspberry Pi 4, it has dual micro HDMI output which achieves up to 4K video. It would have been be lovely to have had full-size HDMI connectors, but in order to achieve this we would have to remove other functions, or make a bulkier unit. However, the kit does come with a micro HDMI-to-HDMI cable to cheer you all up.
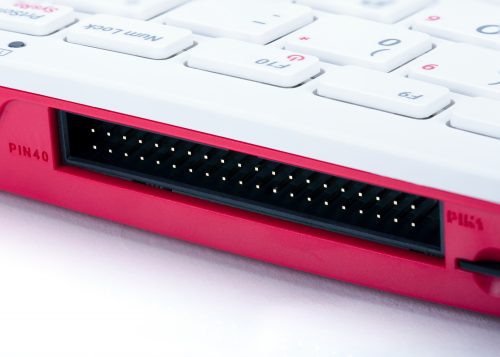
We kept the GPIO connector since it is loved so much by beginners and experts alike, and this is after all a Raspberry Pi – we want people to be able to use it for tinkering and prototyping. The HAT functionality works better with an extender cable, which you can buy from numerous websites.

1.8GHz!
Raspberry Pi 400 has the same circuit layout of the power management, processor, and memory as Raspberry Pi 4, but with one major difference: we’ve adjusted the operating point to 1.8GHz! And did I mention cooling? We’ve solved the cooling challenge so users don’t have to give this any thought. Raspberry Pi 400 contains a heat spreader that dissipates the heat across the whole unit, front and back, so that no part of it will feel too hot to touch. In fact, there is enough thermal margin to overclock it, if you’re so inclined.
Why not the Compute Module?
Some folks have asked us why we did not fit the Raspberry Pi Compute Module inside. The reason is that above a certain scale, it generally makes more sense to go with a custom PCB rather than a module with a carrier board. With hundreds of thousands of Raspberry Pi 400 units in the first instance, we are above that scale.
Turn it off and on again
We also have a feature that is completely new to Raspberry Pi products: an on/off button! Power off is achieved by pressing Fn+F10. This is a soft control that negotiates with Linux to shut down, so you don’t corrupt your memory card or your USB drive. Power can be restored by holding down F10 (or Fn+F10) for two seconds.
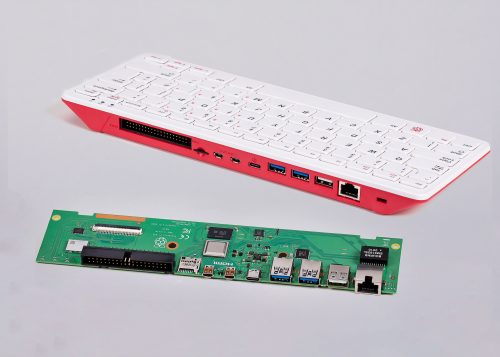
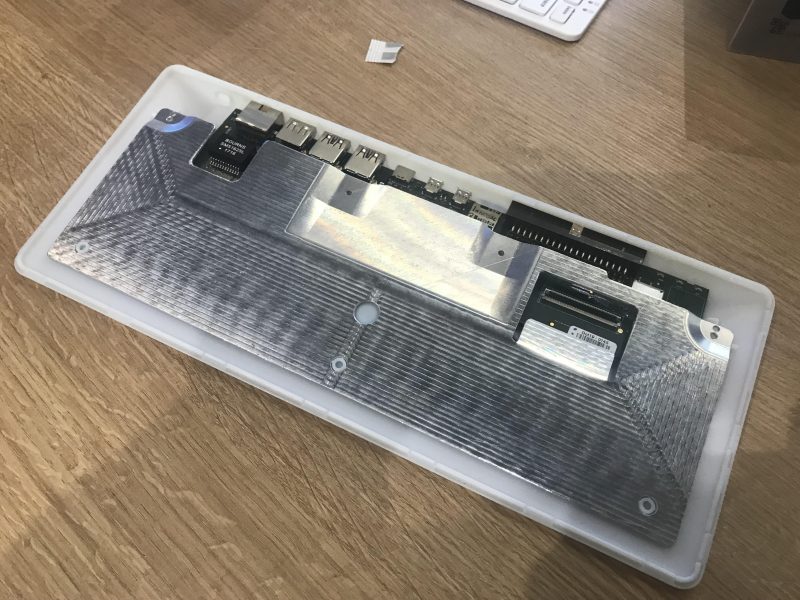
Prototyping
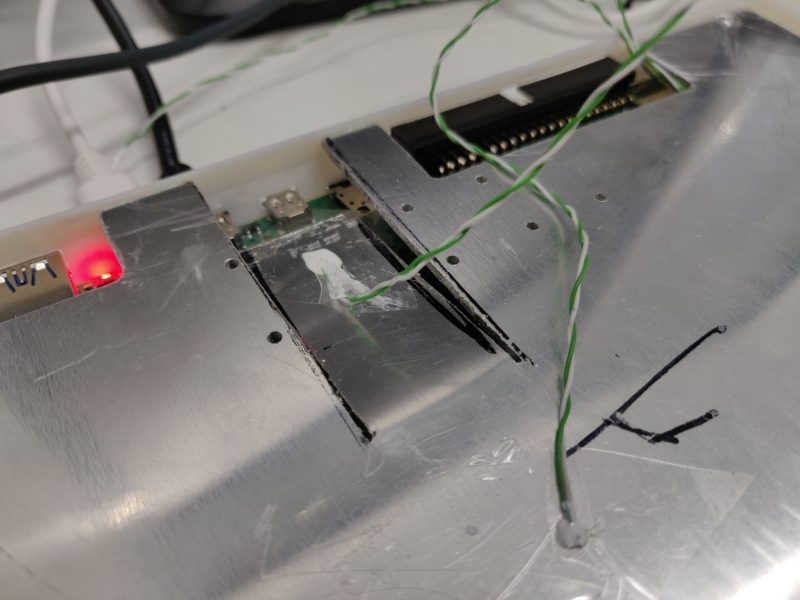
A lot of love went into making this the best possible product we can manufacture, and it has been through extensive alpha testing and compliance testing. I thought I would show you the insides of a very early prototype. There are already some teardown videos online if you want to see how Raspberry Pi 400 is put together; it has not changed much from this:
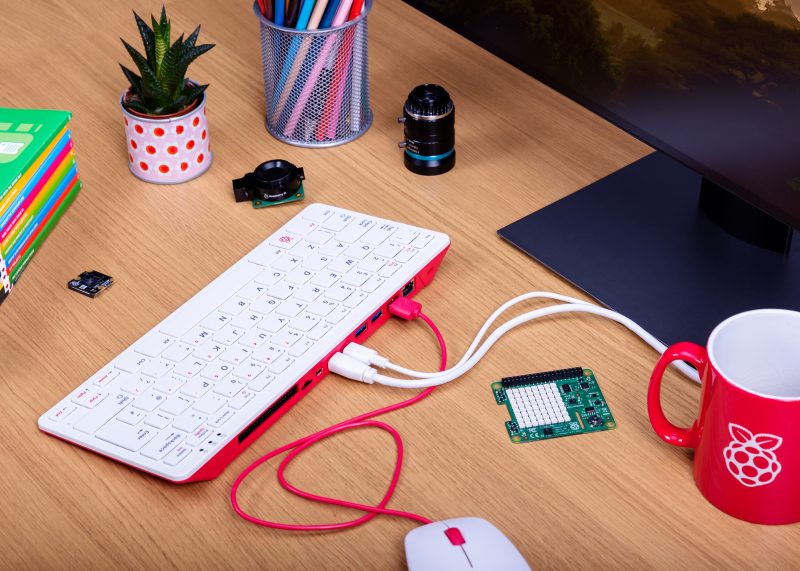
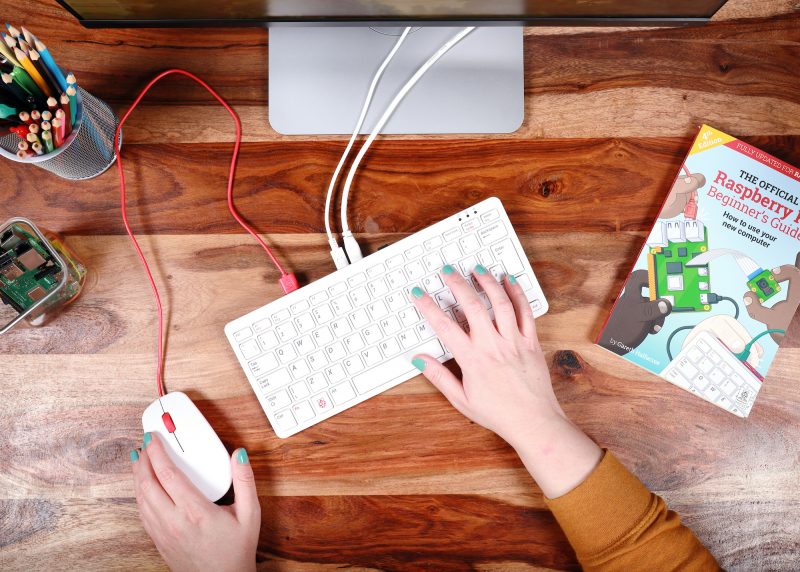
Raspberry Pi 400 kit
The official Raspberry Pi mouse has been a lovely product to have available where Raspberry Pi 400 is concerned, because now we can provide a complete kit of official matching Raspberry Pi parts that looks fantastic on your desk. The kit comes with the SD card already programmed and inserted, so on Christmas day, you just need to plug it into the family TV and start coding. No frantic searches for somewhere that sells memory cards!
The kit includes:
- Raspberry Pi 400 computer with choice of six keyboard countries (more to follow)
- Official Raspberry Pi mouse
- Raspberry Pi USB-C DC power source, with adaptors for each country
- SD card ready-fitted in the unit with the latest software release installed
- micro HDMI to HDMI cable
- Jewel box to store the SD card
- Fourth-edition Raspberry Pi Beginner’s Guide book with instructions for getting started with Raspberry Pi 400, as well as loads of things you can do with it
Ode to Commodore
Finally, a bit of fun to finish with. On Christmas morning 1985, I opened the polystyrene box of a Commodore 64 computer and the world switched on for me. It had the best games and the best sound, and it was easy to program. We think the combination of gaming and programming still works today, but we’ve come a long way since 1985. Here’s a chart to show how a Commodore 64 and a Raspberry Pi 400 compare.
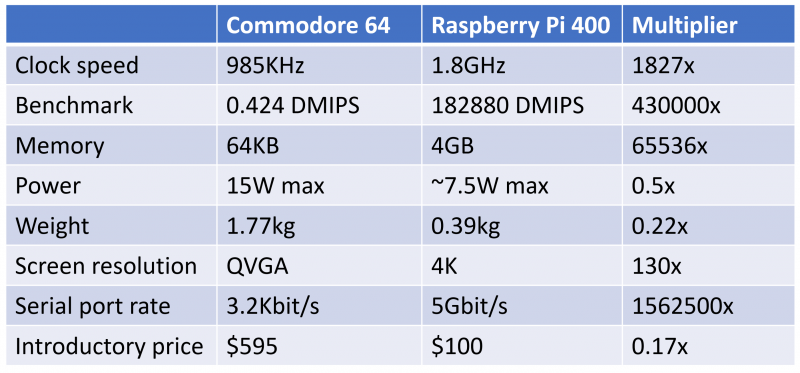
I particularly like the benchmark increase for less than half the power. This makes Raspberry Pi 4 almost a million times more efficient at processing data.
We do hope this bring smiles to the faces of those fortunate enough to get one by Christmas. The factory has been running flat-out for the last two months building up stock – order yours soon though, since they’ll sell quickly!
Special thanks to…
Alwyn Roberts, Andy Liu, Anthony Morton, Antti Silventoinen, Austin Su, Ben Stephens, Brendan Moran, Craig Wightman, Daniel Thompsett, David Christie, David John, David Lenton, Dominic Plunkett, Eddie Thorn, Gordon Hollingworth, Helen Marie, Jack Willis, James Adams, Jeremy Wang, Joe Whaley, Keiran Abraham, Keri Norris, Kuanhsi Ho, Laurent Le Mentec, Mandy Oliver, Mark Evans, Michael Howells, Mike Buffham, Mike Unwin, Peter Challis, Phil Elwell, Rhys Polley, Richard Jones, Rob Matthews, Roger Thornton, Sherman Liu, Simon Lewis, Simon Oliver, Tim Gover, Tony Jones, Viktor Lundström, Wu Hairong, and all the alpha testers and resellers who made Raspberry Pi 400 possible.
Website: LINK
Schreibe einen Kommentar
Du musst angemeldet sein, um einen Kommentar abzugeben.