
If your amazing project is a little too quiet, add high-fidelity sound with Raspberry Pi and the help of this handy guide from HackSpace magazine, written by PJ Evans.
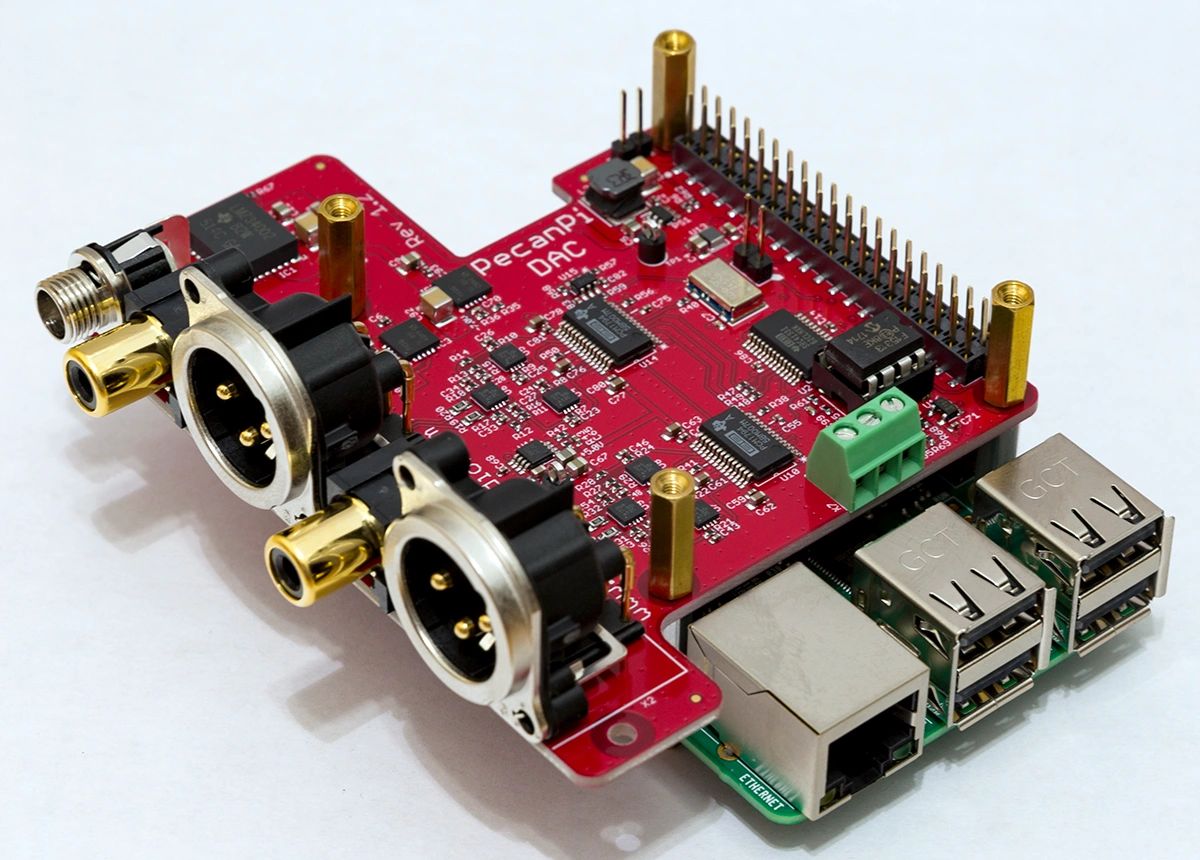
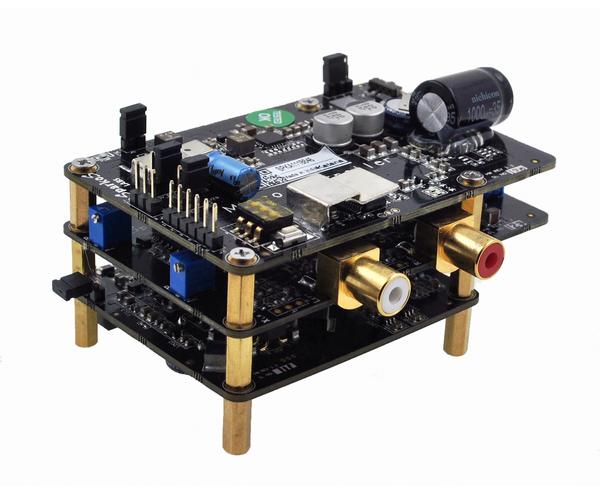
The PecanPi HAT features best-in-class components and dual DACs for superior audio reproduction
It’s no surprise that we love microcontrollers at HackSpace magazine. Their versatility and simplicity make them a must for electronics projects. Although a dab hand at reading sensors or illuminating LEDs, Arduinos and their friends do struggle when it comes to high-quality audio. If you need to add music or speech to your project, it may be worth getting a Raspberry Pi computer to do the heavy lifting. We’re going to look at the various audio output options available for our favourite small computer, from a simple buzz, through to audiophile bliss.
Get buzzing

Need to keep it simple and under a pound?
An active buzzer is what you need
The simplest place to start is with the humble buzzer. A cheap active buzzer can be quickly added to Raspberry Pi’s GPIO. It’s surprisingly easy too. Try connecting a buzzer’s red wire (positive) to GPIO pin 22 (Broadcom numbering) and the black wire (ground) to any GND pin. Now, install the GPIO Zero Python library by typing this at the command line:
sudo apt install python3-gpiozero
Create a file called buzz.py in your favourite editor and enter the following:
import time from gpiozero import Buzzer buzzer = Buzzer(22) buzzer.on() time.sleep(1) buzzer.off()
Run it at the command line:
python3 buzz.py
You should hear a one-second buzz. See if you can make Morse code sounds by changing the duration of the sleep statement.
Passive but not aggressive
Raspberry Pi computers, with the exception of the Zero range, all have audio output on board. The original Raspberry Pi featured a stereo 3.5mm socket, and all A and B models since feature a four-pole socket that also includes composite video. This provides your cheapest route to getting audio from your Raspberry Pi computer.
A low-cost passive speaker can be directly plugged in to provide sound, albeit probably quieter than you’d like. Of course, add an amplifier or active speaker and you have sound as loud as you like. This is the most direct way of adding sound to your project, but how to get the sound out?
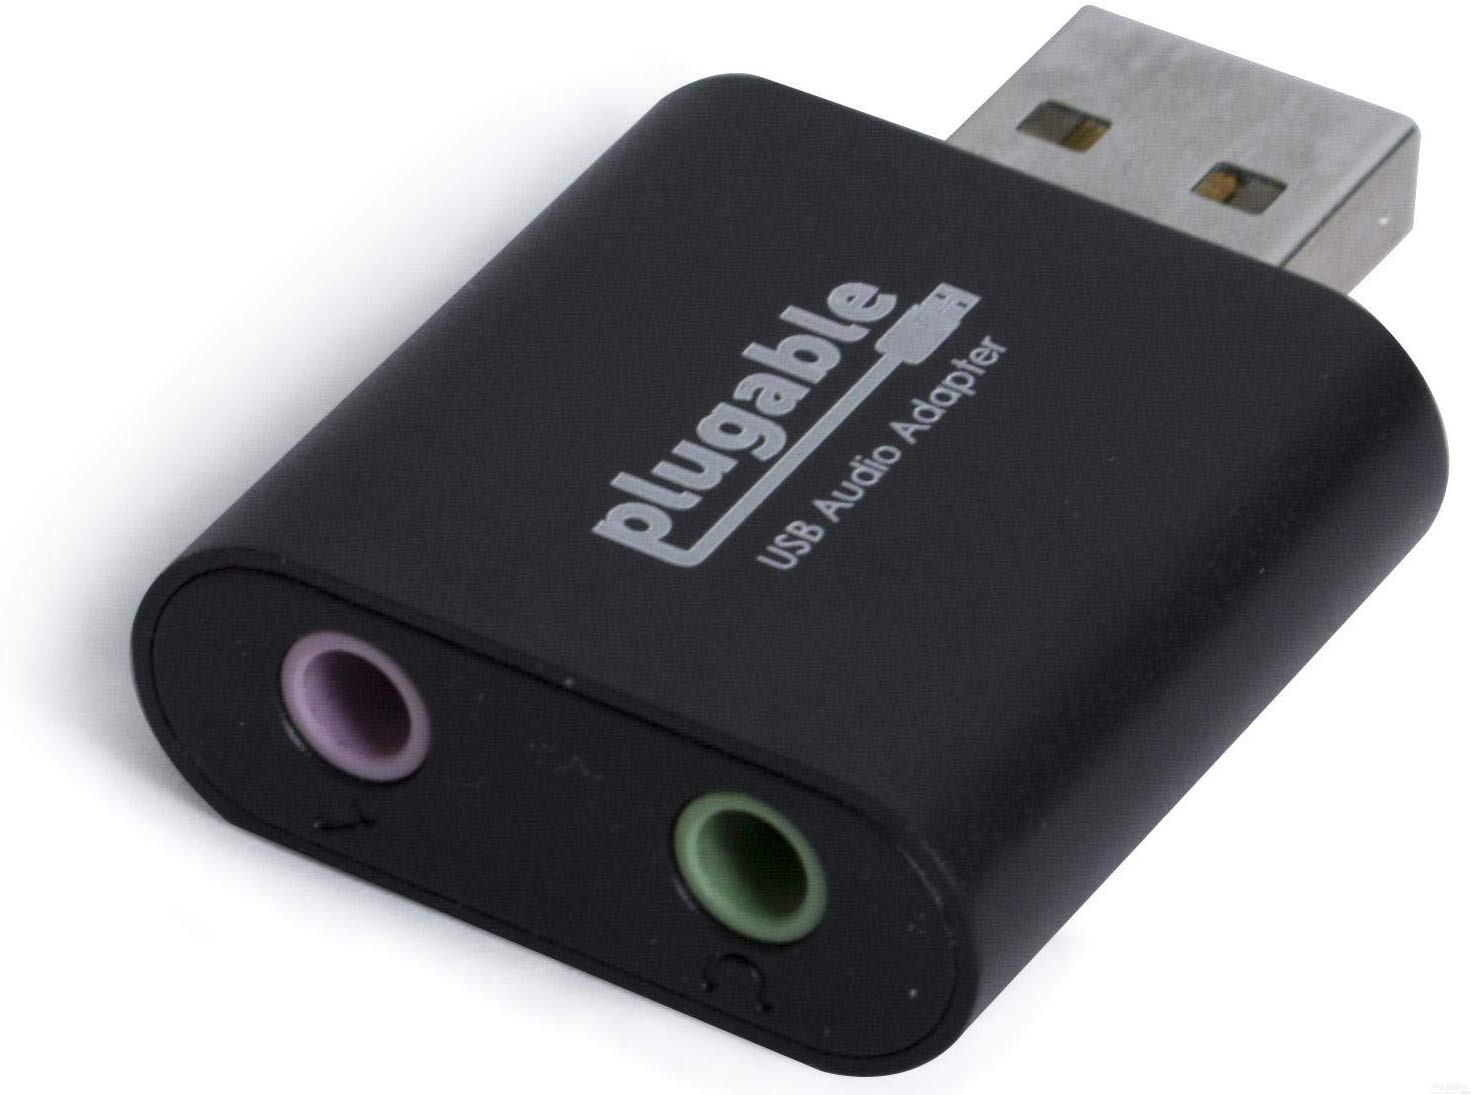
Need a simple solution? USB audio devices come in all shapes and sizes but are mostly plug-and-play
Normally, the Raspbian operating system will recognise that an audio device has been connected and route audio through it. Sometimes, especially if you’ve connected an HDMI monitor with sound capability (e.g. an HDMI TV), sound will not come out of the correct device.
To fix this, open up a terminal window and run sudo raspi-config. When the menu appears, go to Advanced Options and select Audio, then select the option to force the output through the audio jack. You may need to reboot Raspbian for all changes to take effect.
Plug and playback
A USB sound device is another simple choice for audio playback on Raspberry Pi. Literally hundreds are available, and a basic input/output device with better audio quality than the on-board system can be purchased for a few pounds online. Installation tends to be no more complicated than plugging the device into the USB port. You may need to select the new output, as the underlying audio system, ALSA (see the ALSA and PulseAudio section for more), may mute it by default. To fix this, run alsamixer from the command line, press F6 to select the new sound device, and if you see ‘MM’ at the bottom of the volume indicator, press M to unmute and adjust the volume with the cursor keys.
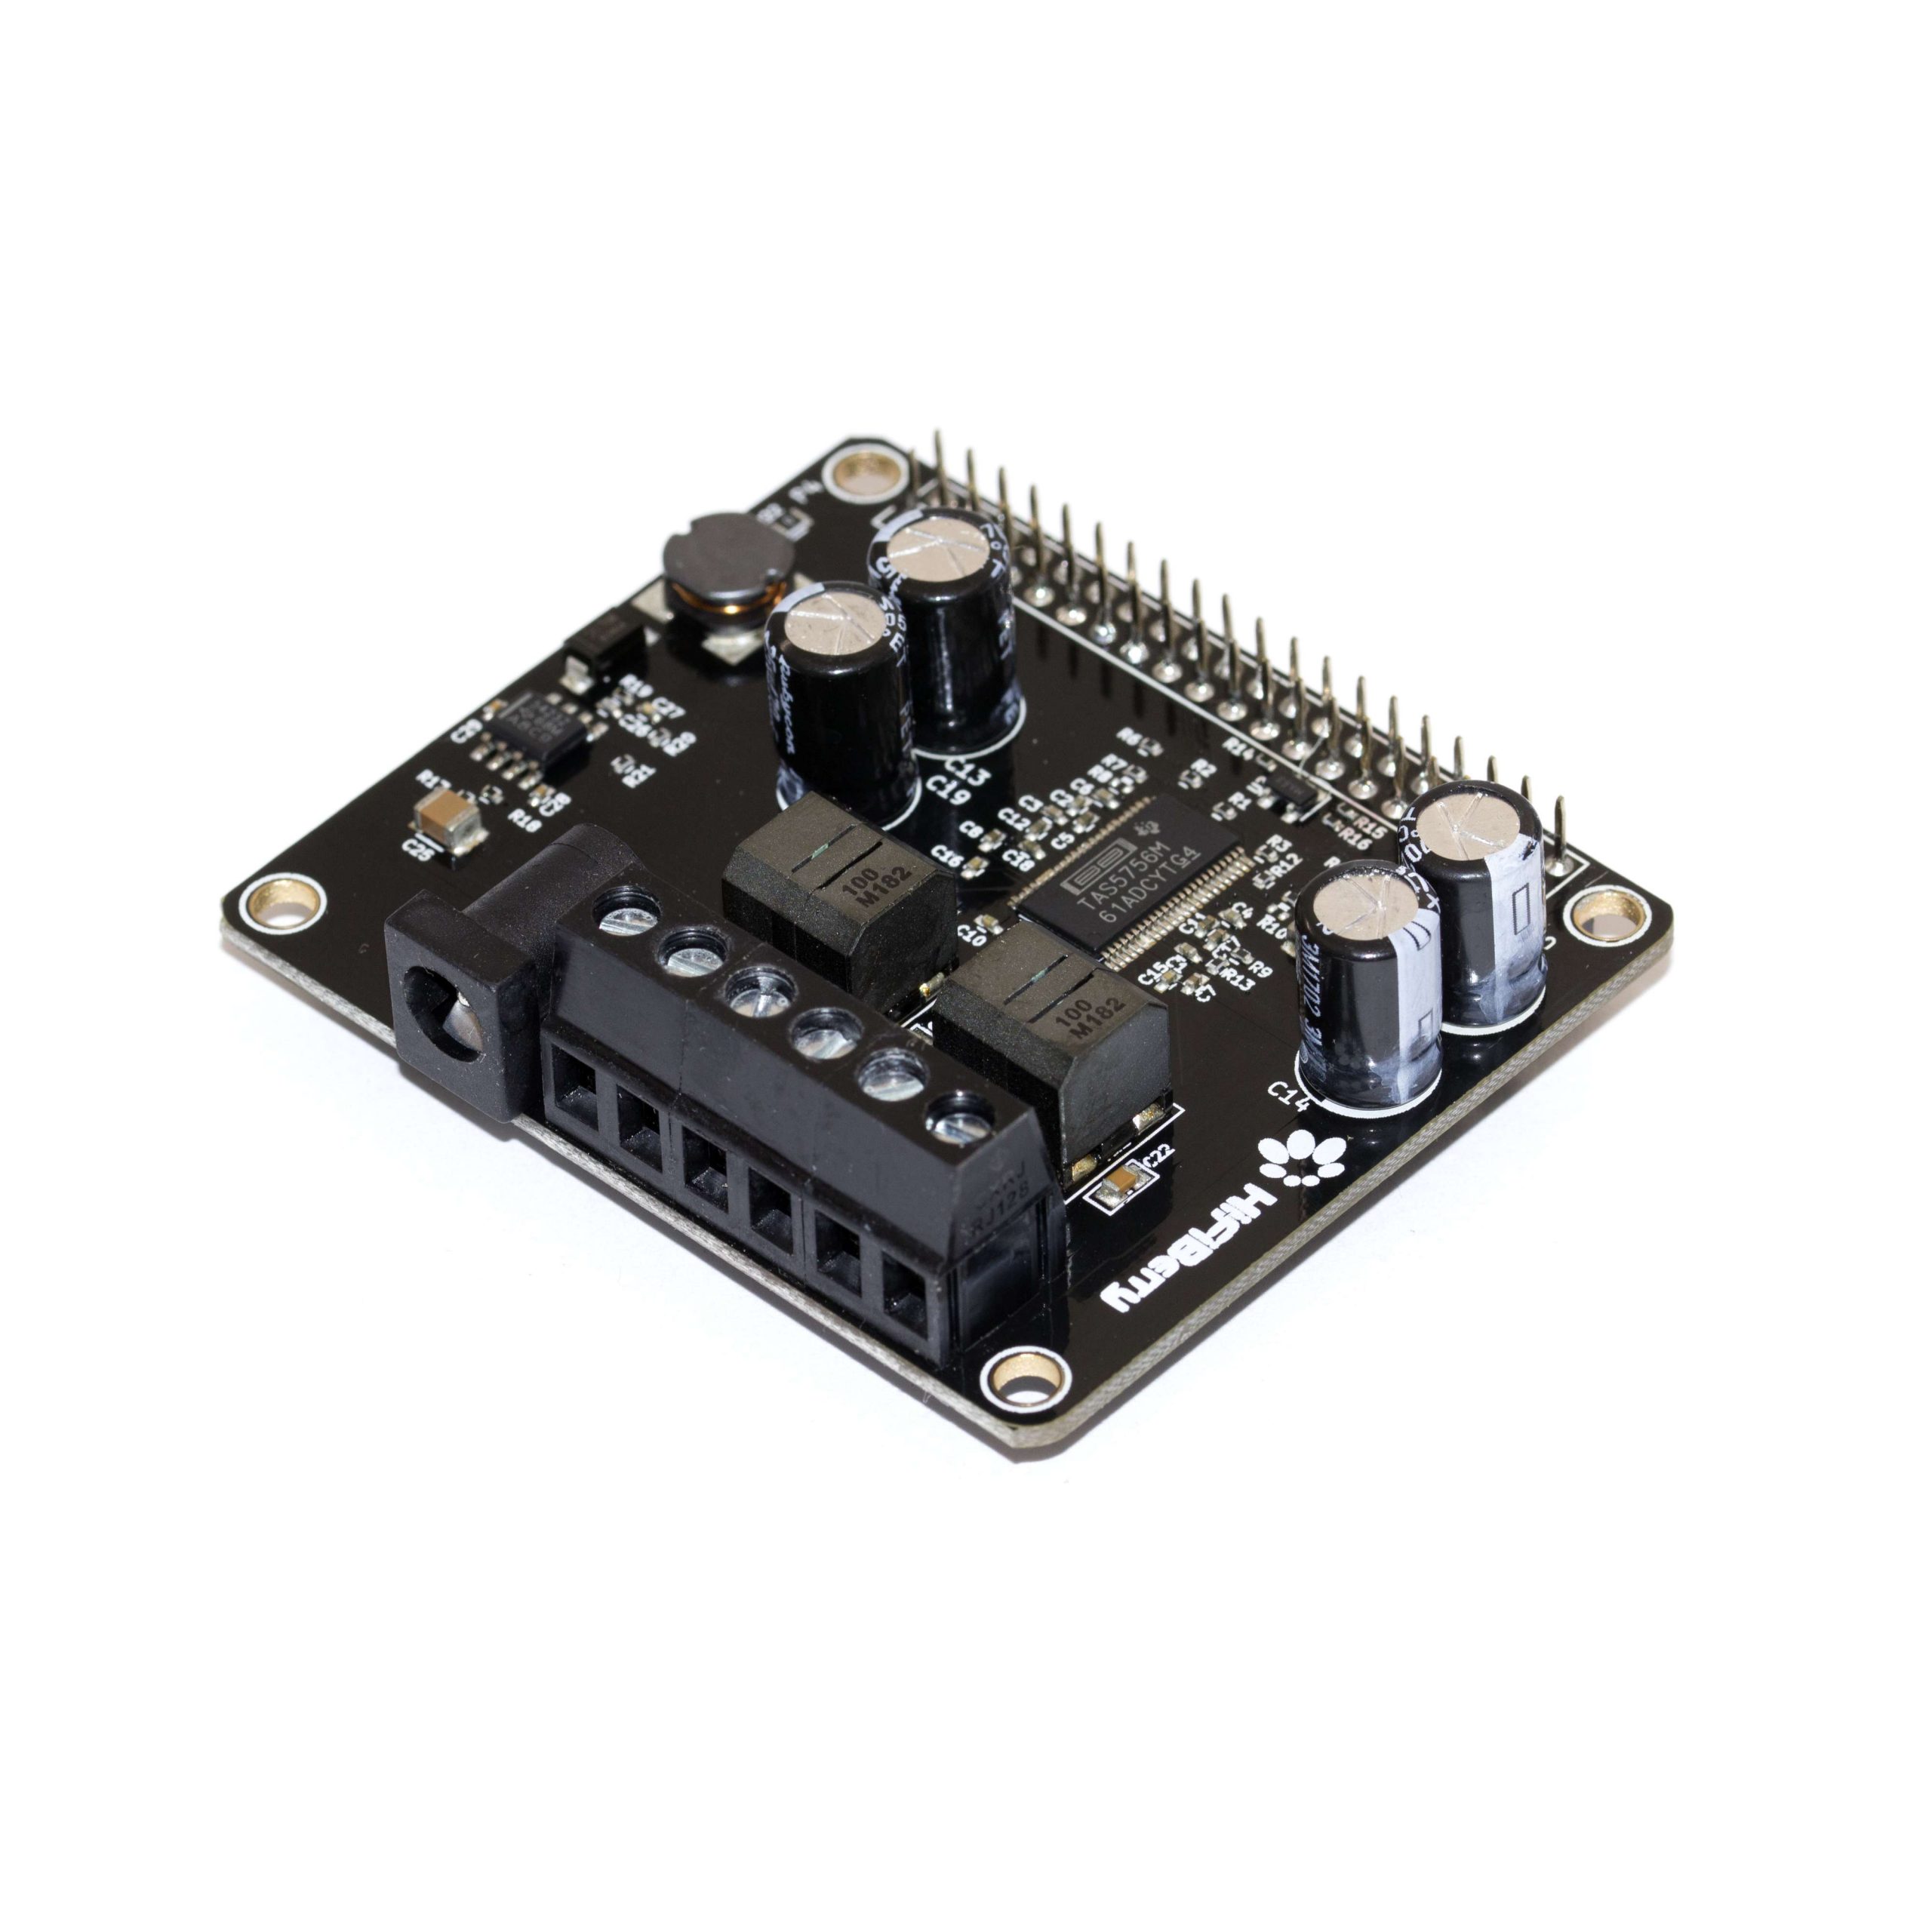
Many DACs also come with on-board amplifiers. Perfect for passive speakers
Unsurprisingly, when choosing your USB sound device, you can start at a few pounds and go right up to professional equipment costing hundreds. As they are low-power, USB devices do not tend to feature amplification, unless they have a separate power source.
Let’s play
The simplest way to play audio on Raspbian is to use OMXPlayer. This is a dedicated hardware-accelerated command-line tool that takes full advantage of Raspberry Pi’s capabilities. It sends audio to the analogue audio jack by default, so playing back an MP3 file is as simple as running:
omxplayer /path/to/audio/file.wav
There are many command-line options that allow you to control how the audio is played. Want the audio to loop forever? Just add --loop to the command. You’ll notice that when it’s running, OMXPlayer provides a user interface of sorts, allowing you to control playback from within the terminal. If you’d just like it to run in the background without user input, run the command like this:
omxplayer --no-keys example.wav &
Here, —-no-keys removes the interface, and the ampersand (&) tells the operating system to run the job ‘in the background’ so that it won’t block anything else you want to do.
OMXPlayer is a great choice for Raspbian, but other players such as mpg321 are available, so find the tool that’s best for you.
Another useful utility is speaker-test. This can produce white noise or vocal confirmation so you can check your speakers are working properly. It’s as simple as this:
speaker-test -t wav -c 2
The first parameter sets the sound to be a voice, and the -c tests stereo channels only: front left and front right.
Phat Beats
If space is an issue, a Raspberry Pi 4, amplifier, and speaker may not be what you have in mind. After all, your cool wearable project is going to be problematic if you’re trailing an amplifier on a cart with a 50-metre extension lead powering everything. Luckily, the clever people at Pimoroni have you covered. The Speaker pHAT is a Raspberry Pi Zero-sized HAT that not only adds audio capability to the smallest of the Raspberry Pi family, but also sports a 3 W speaker. Now you can play any audio with a tiny device and a USB battery pack.
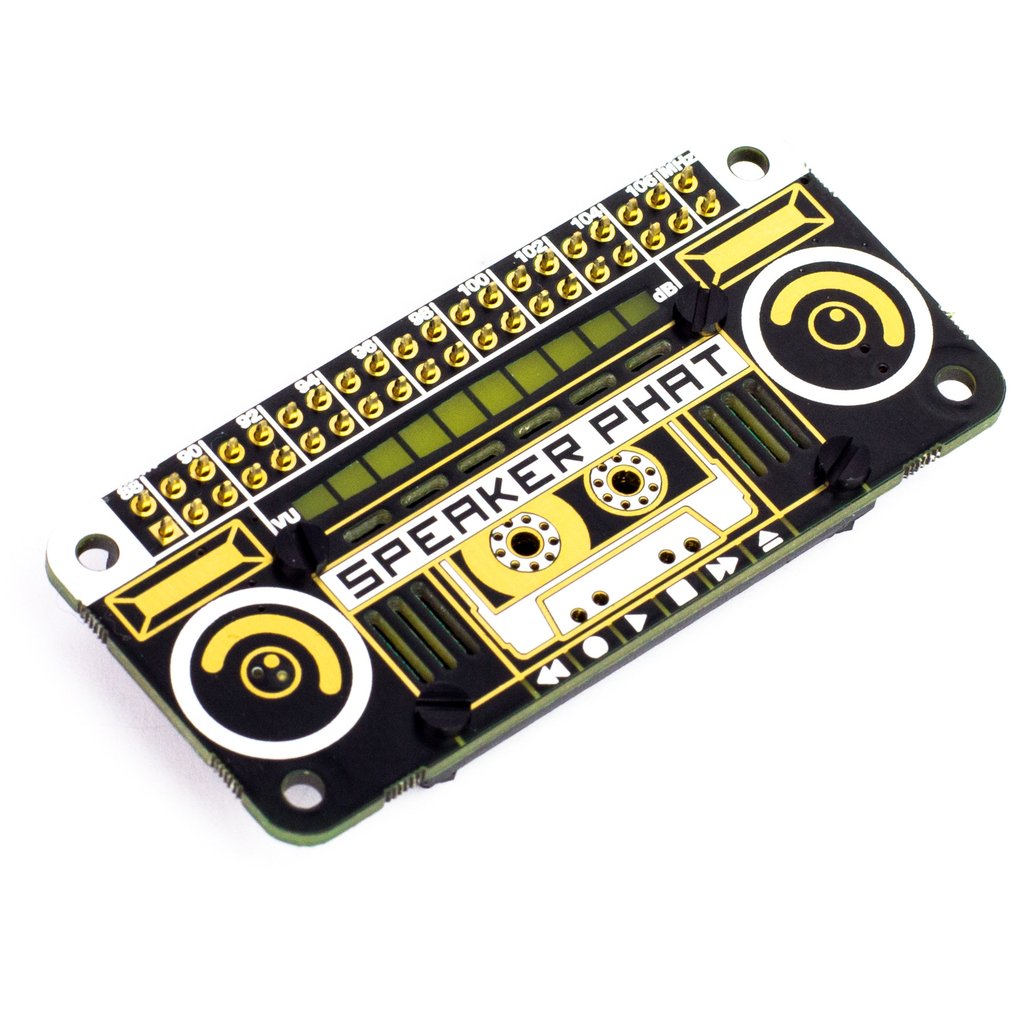
Small, cheap, and fun, the Speaker pHat features a 3 W speaker and LED VU meter
The installation process is fully automated, so no messing around with drivers and config files. Once the script has completed, you can run any audio tool as before, and the sound will be routed through the speaker. No, the maximum volume won’t be troubling any heavy metal concerts, but you can’t knock the convenience and form factor.
Playing the blues
An easy way to get superior audio quality using a Raspberry Pi computer is Bluetooth. Recent models such as the 3B, 4, and even the Zero W support Bluetooth devices, and can be paired with most Bluetooth speakers, even from the command line. Once connected, you have a range of options on size and output power, plus the advantage of wireless connectivity.
Setting up a Bluetooth connection, especially if you are using the command line, can be a little challenging (see the Bluetooth cheatsheet section). There is a succinct guide here: hsmag.cc/N6p2IB. If you are using Raspbian Desktop, it’s a lot easier. Simply click on the Bluetooth logo on the top-right, and follow the instructions to pair your device.
If you find OMXPlayer isn’t outputting any audio, try installing mpg321:
sudo apt install mpg321
And try again:
mpg321 /path/to/audio/file.mp3
But seriously
If your project needs good audio, and the standard 3.5 mm output just isn’t cutting it, then it’s time to look at the wide range of DACs (digital-to-analogue converters) available in HAT format. It’s a crowded market, and the prices vary significantly depending on what you want from your device. Let’s start at the lower end, with major player HiFiBerry’s DAC+ Zero. This tiny HAT adds 192kHz/24-bit playback via two RCA phono ports for £12.50. If you’re serious about your audio, then you can consider the firm’s full HAT format high-resolution DAC+ Pro for £36, or really go for it with the DSP (digital sound processing) version for £67. All of these will require amplification, but the sound quality will rival audio components of a much higher price.
Money no object? The Allo Katana is a monster DAC, and weighs in at £240, but outperforms £1000 equivalents
If money is no object and your project requires the best possible reproduction, then you can consider going full audiophile. There are some amazing high-end HATs out there, but one of the best-performing ones we’ve seen is the PecanPi DAC. Its creator Leonid Ayzenshtat sourced each individual component carefully, always choosing the best-in-class. He even used a separate DAC for each audio channel. The resulting board may make your wallet wince at around £200 for the bare board, but the resulting audio is good enough to be used in professional recording studios. If you’ve restored a gorgeous old radio back to showroom condition, you could do a lot worse than add the board in with a great amp and speaker.
ALSA and PulseAudio
There’s often confusion between these two systems. Raspbian comes pre-installed with ALSA (Advanced Linux Sound Architecture), which is the low-level software that makes sound work. It comes with a range of utilities to control output device, volume, and more. PulseAudio is a software layer that sits on top of ALSA to provide more features, including streaming capabilities. Chances are, if you need to do something a bit more clever than just play audio, you’ll need to install a PulseAudio server.
Bluetooth cheatsheet
If you want to pair a Bluetooth audio device (A2DP) on the command line, it can be a little hairy. Here’s a quick guide:
First-time installation:
sudo apt-get install pulseaudio pulseaudio-module-bluetooth sudo usermod -G bluetooth -a pi sudo reboot
Start the PulseAudio server:
pulseaudio --start
Run the Bluetooth utility:
bluetoothctl
Put your speaker into pairing mode. Now, within the utility, run the following commands (pressing Enter after each one):
power on agent on scan on
Now wait for the list to populate. When you see your device…pair <dev>
Where <dev> is the displayed long identifier for your device. You can just type in the first few characters and press Tab to auto-complete. Do the same for the following steps.
trust <dev> connect <dev>
Wait for the confirmation, then enter:
quit <dev>
Now try to play some audio using aplay (for WAV files) or mpg321 (for mp3). These instructions are adapted from the guide by Actuino at hsmag.cc/N6p2IB.
File types
There are command-line players available for just about every audio format in common use. Generally, MP3 provides the best balance of quality and space, but lower bit-rates result in lower sound quality. WAV is completely uncompressed, but can eat up your SSD card. If you don’t want to compromise on audio quality, try FLAC, which is identical in quality to WAV, but much smaller. To convert between audio types, consider installing FFmpeg, a powerful audio and video processing tool.
HackSpace magazine
This article comes direct from HackSpace magazine issue 28, out now and available in print from your local newsagent, the Raspberry Pi Store in Cambridge, and online from Raspberry Pi Press.
If you love HackSpace magazine as much as we do, why not have a look at the subscription offers available, including the 12-month deal that comes with a free Adafruit Circuit Playground! Subscribers in the USA can now get a 12-month subscription for $60 when joining by the end of March!

And, as always, you can download the free PDF from the Raspberry Pi Press website.
Website: LINK