Code the map and movement basics of the innovative marble-rolling arcade game. Mark Vanstone shows you how.
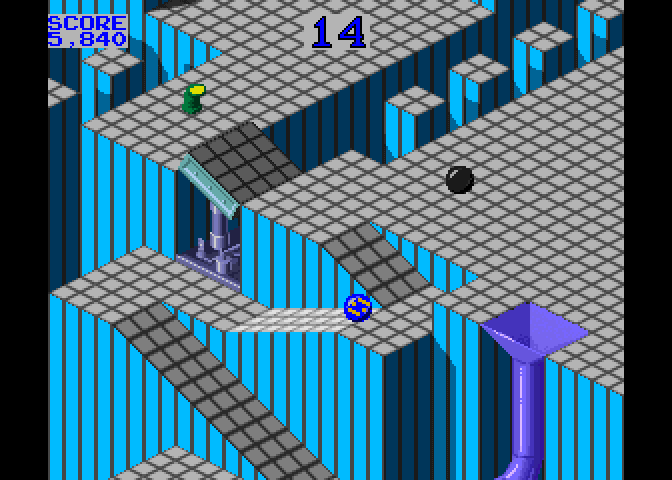
Each of Marble Madness’ six levels got progressively harder to navigate and had to be completed within a time limit.
Marble Madness
Hitting arcades in 1984, Atari’s Marble Madness presented a rather different control mechanism than other games of the time. The original arcade cabinet provided players with a trackball controller rather than a conventional joystick, and the aim was to guide a marble through a three-dimensional course in the fastest possible time. This meant that a player could change the angle and speed of the marble as it rolled and avoid various obstacles and baddies.
During development, designer Mark Cerny had to shelve numerous ideas for Marble Madness, since the hardware just wasn’t able to achieve the level of detail and interaction he wanted. The groundbreaking 3D display was one idea that made it through to the finished game: its pre-rendered, ray-traced isometric levels.
Marble Madness was the first game to use Atari’s System 1 upgradeable hardware platform, and also boasted the first use of an FM sound chip produced by Yamaha to create its distinctive stereo music. The game was popular in arcades to start with, but interest appeared to drop off after a few months – something Cerny attributed to the fact that the game didn’t take long to play. Marble Madness’s popularity endured in the home market, though, with ports made for most computers and consoles of the time – although inevitably, most of these didn’t support the original’s trackball controls.
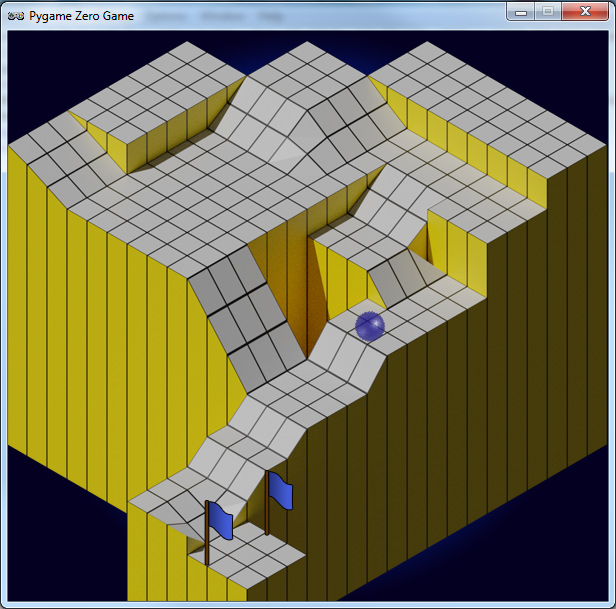
In our sample level, you can control the movement of the marble using the left and right arrow keys.
Making our game
For our version of Marble Madness, we’re going to use a combination of a rendered background and a heightmap in Pygame Zero, and write some simple physics code to simulate the marble rolling over the terrain’s flats and slopes. We can produce the background graphic using a 3D modelling program such as Blender. The camera needs to be set to Orthographic to get the forced perspective look we’re after. The angle of the camera is also important, in that we need an X rotation of 54.7 degrees and a Y rotation of 45 degrees to get the lines of the terrain correct. The heightmap can be derived from an overhead view of the terrain, but you’ll probably want to draw the heights of the blocks in a drawing package such as GIMP to give you precise colour values on the map.
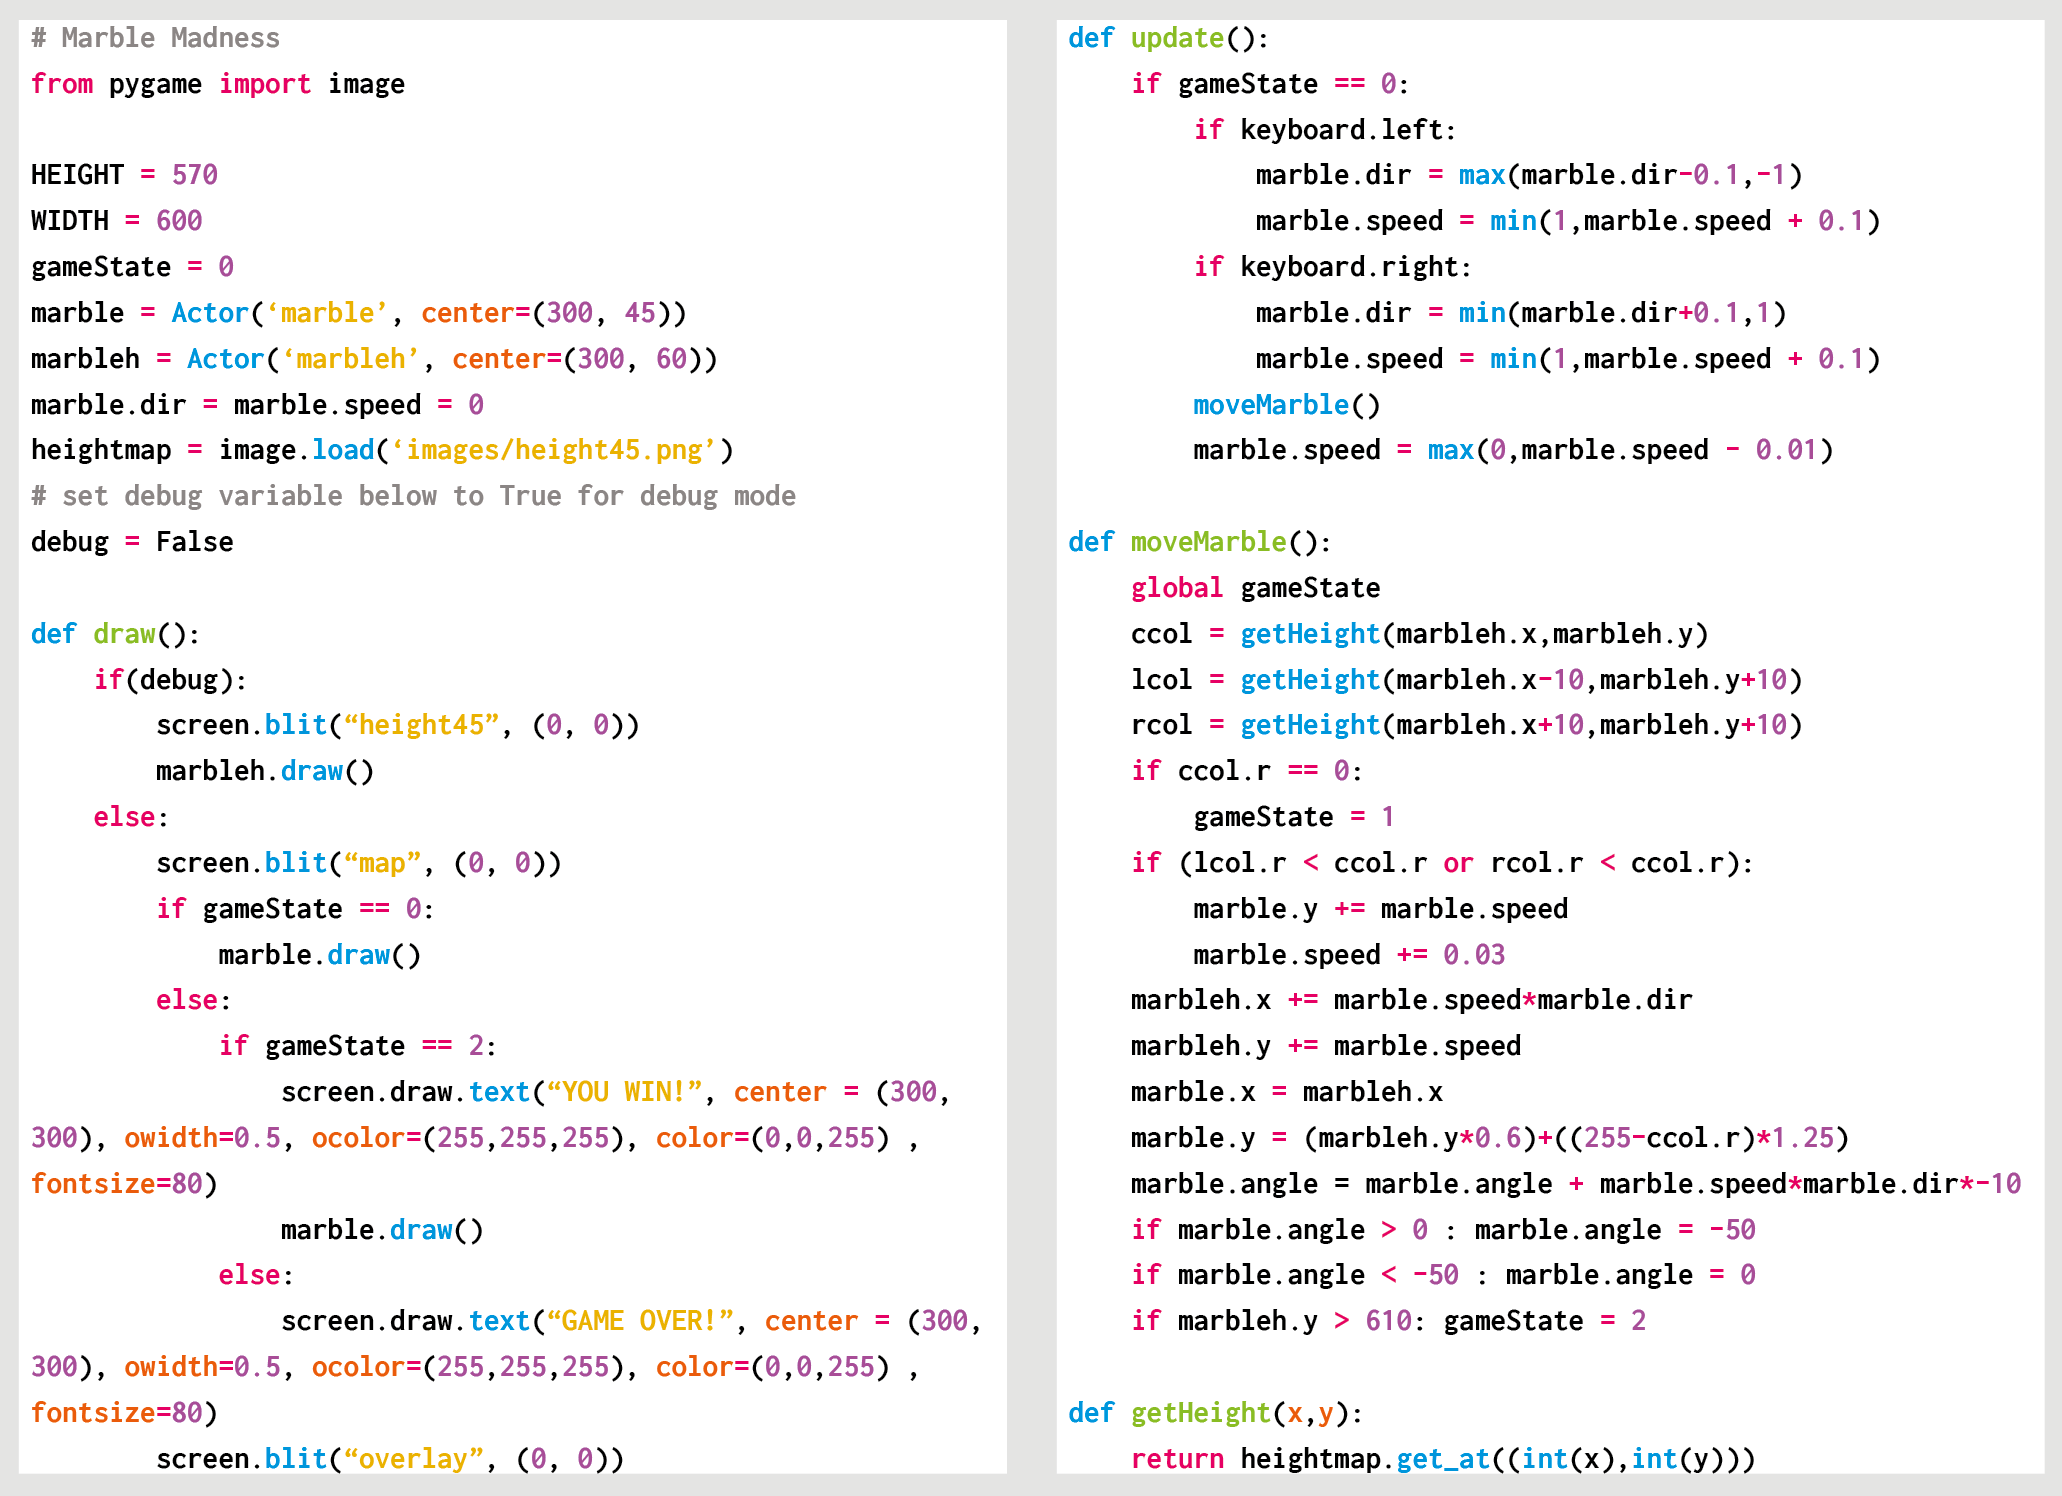
The ball rolling physics are calculated from the grey-shaded heightmap graphic. We’ve left a debug mode in the code; by changing the debug variable to True, you can see how the marble moves over the terrain from the overhead viewpoint of the heightmap. The player can move the marble left and right with the arrow keys – on a level surface it will gradually slow down if no keys are pressed. If the marble is on a gradient on the heightmap, it will increase speed in the direction of the gradient. If the marble hits a section of black on the heightmap, it falls out of play, and we stop the game.
That takes care of the movement of the marble in two dimensions, but now we have to translate this to the rendered background’s terrain. The way we do this is to translate the Y coordinate of the marble as if the landscape was all at the same level – we multiply it by 0.6 – and then move it down the screen according to the heightmap data, which in this case moves the marble down 1.25 pixels for each shade of colour. We can use an overlay for items the marble always rolls behind, such as the finish flag. And with that, we have the basics of a Marble Madness level.
Here’s Mark’s code snippet, which creates a Marble Madness level in Python. To get it working on your system, you’ll need to install Pygame Zero. And to download the full code, go here.
Module Madness
We use the image module from Pygame to sample the colour of the pixel directly under the marble on the heightmap. We also take samples from the left diagonal and the right diagonal to see if there is a change of height. We are only checking for left and right movement, but this sample could be expanded to deal with the two other directions and moving up the gradients, too. Other obstacles and enemies can be added using the same heightmap translations used for the marble, and other overlay objects can be added to the overlay graphic.
Get your copy of Wireframe issue 34
You can read more features like this one in Wireframe issue 34, available now at Tesco, WHSmith, all good independent UK newsagents, and the Raspberry Pi Store, Cambridge.
Or you can buy Wireframe directly from Raspberry Pi Press — delivery is available worldwide. And if you’d like a handy digital version of the magazine, you can also download issue 34 for free in PDF format.

Make sure to follow Wireframe on Twitter and Facebook for updates and exclusive offers and giveaways. Subscribe on the Wireframe website to save up to 49% compared to newsstand pricing!
Website: LINK