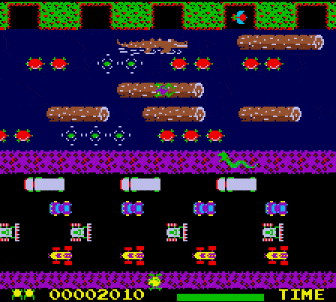
In HackSpace magazine issue 28 we had a look at how to create an ultrasonic controller for a version of Pong called Boing!. This month, we’re going to take a step further forward through video game history and look at the game Frogger. In this classic game, you control a frog as it makes its way across logs, roads, and train tracks, avoiding falling in the water or getting hit.

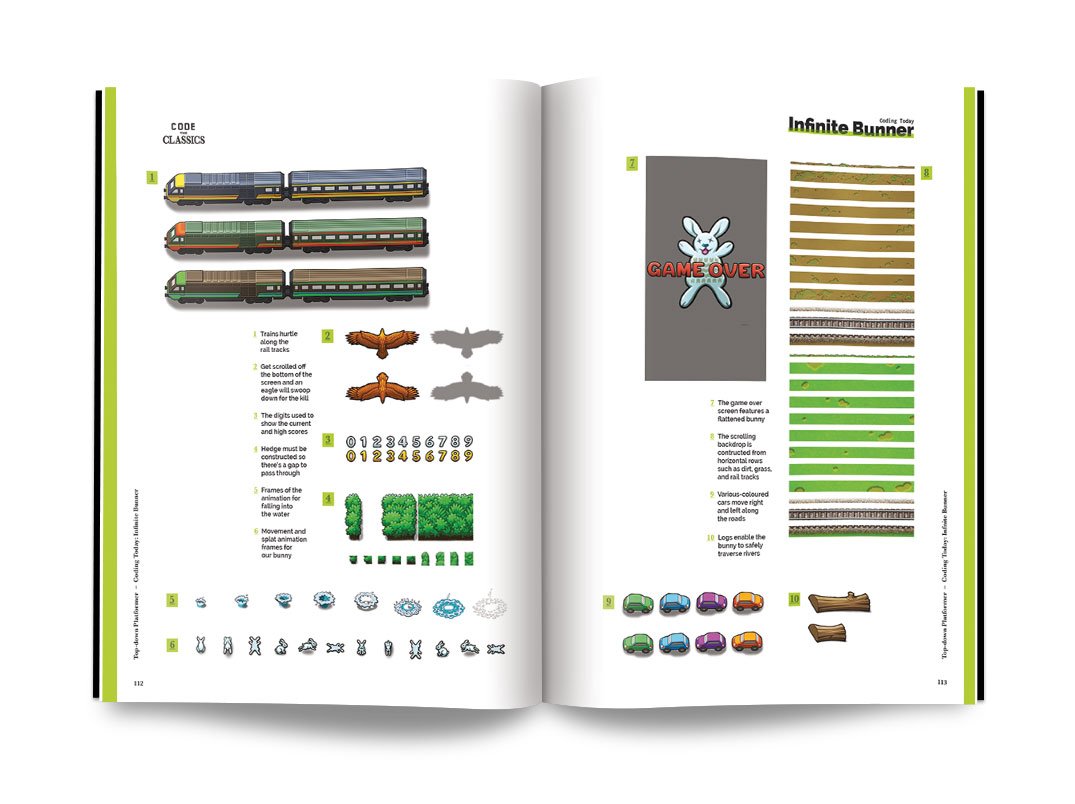
Infinite Bunner
The tribute to Frogger in the new Code the Classics Volume 1 book is called Infinite Bunner, and works in much the same way, except you control a bunny.
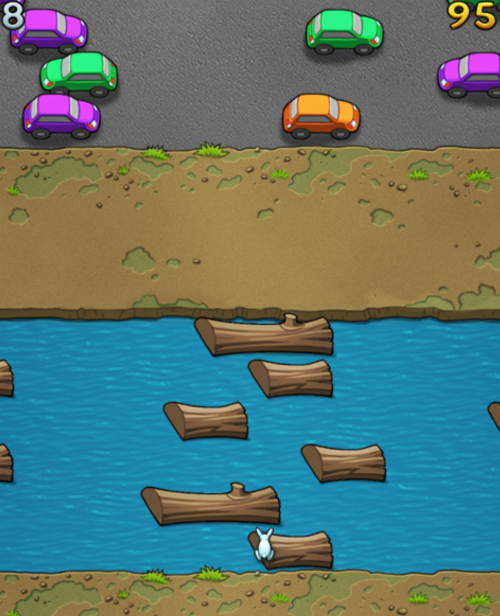
Jump along the logs, dodge the traffic, avoid the trains, and keep your bunny alive for as long as possible
All this hopping got us thinking about a controller. Our initial idea was that since the animals jump, so should the controller. An accelerometer can detect freefall, so it shouldn’t be too hard to convert that into button presses. However, it turns out that computer-controlled frogs and rabbits can jump much, much faster than humans can, and we really struggled to get a working game mechanic, so we compromised a little and worked with ‘flicks’.
The flick controller
The basic idea is that you tilt the controller left or right to move left or right, but you have to flick it up to register a jump (simply holding it upright won’t work).
We’ve used a Circuit Playground Bluefruit as our hardware, but it would work equally well with a Circuit Playground Express. There are two key parts to the software. The first is reading in accelerometer values and use these to know what orientation the board is in, and the second is the board mimicing a USB keyboard and sending keystrokes to any software running on it.
Playing Infinite Bunner
The first step is to get Infinite Bunner working on your machine.
Get your copy of Code the Classics today
You can download the code for all the Code the Classics Volume 1 games here. Click on Clone or Download > Download ZIP. Unzip the download somewhere.
You’ll need Python 3 with Pygame Zero installed. The process for this differs a little between different computers, but there’s a good overview of all the different options on page 186 of Code the Classics.
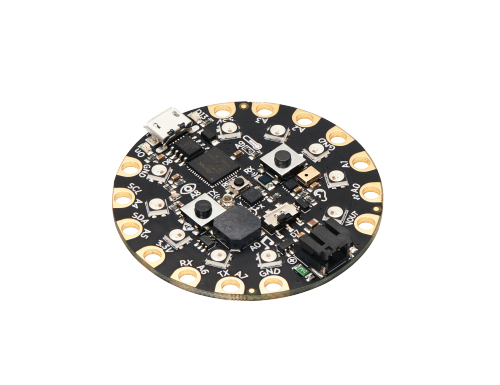
Subscribe to HackSpace magazine for twelve months and you get a Circuit Playground Express for free! Then you can make your very own Infinite Bunner controller
Once everything’s set up, open a terminal and navigate to the directory you unzipped the code in. Then, inside that, you should find a folder called bunner-master and move into that. You can then run:
python3 bunner.py
Have a few goes playing the game, and you’ll find that you need the left, right, and up arrow keys to play (there is also the down arrow, but we’ve ignored this since we’ve never actually used it in gameplay – if you’re a Frogger/Bunner aficionado, you may wish to implement this as well).
Reading the accelerometer is as easy as importing the appropriate module and running one line:
from adafruit_circuitplayground import cpx, y, z = cp.acceleration
Sending key presses is similarly easy. You can set up a keyboard with the following:
from adafruit_hid.keyboard import Keyboard from adafruit_hid.keyboard_layout_us import KeyboardLayoutUS from adafruit_hid.keycode import Keycode keyboard = Keyboard(usb_hid.devices)
Then send key presses with code such as this:
time.keyboard.press(Keycode.LEFT_ARROW) time.sleep(0.1) keyboard.release_all()
The only thing left is to slot in our mechanics. The X-axis on the accelerometer can determine if the controller is tilted left or right. The output is between 10 (all the way left) and -10 (all the way right). We chose to threshold it at 7 and -7 to require the user to tilt it most of the way. There’s a little bit of fuzz in the readings, especially as the user flicks the controller up, so having a high threshold helps avoid erroneous readings.
The Y-axis is for jumping. In this case, we require a ‘flap’ where the user first lifts it up (over a threshold of 5), then back down again.
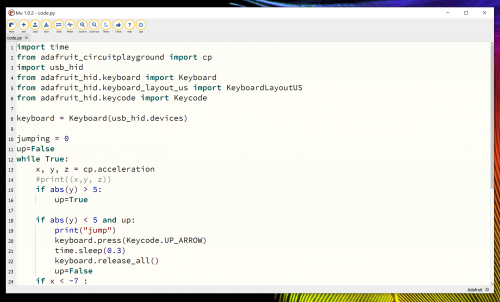
The full code for our controller is:
import time from adafruit_circuitplayground import cp import usb_hid from adafruit_hid.keyboard import Keyboard from adafruit_hid.keyboard_layout_us import KeyboardLayoutUS from adafruit_hid.keycode import Keycode keyboard = Keyboard(usb_hid.devices) jumping = 0 up=False while True: x, y, z = cp.acceleration if abs(y) > 5: up=True if y < 5 and up: keyboard.press(Keycode.UP_ARROW) time.sleep(0.3) keyboard.release_all() up=False if x < -7 : keyboard.press(Keycode.LEFT_ARROW) time.sleep(0.1) keyboard.release_all() if x < 7 : keyboard.press(Keycode.RIGHT_ARROW) time.sleep(0.1) keyboard.release_all() time.sleep(0.1) if jumping > 0: jumping=jumping-1
It doesn’t take much CircuitPython to convert a microcontroller into a games controller
The final challenge we had was that there’s a bit of wobble when moving the controller around – especially when trying to jump repeatedly and quickly. After fiddling with thresholds for a while, we found that there’s a much simpler solution: increase the weight of the controller. The easiest way to do this is to place it inside a book. If you’ve ever held a copy of Code the Classics, you’ll know that it’s a fairly weighty tome. Just place the board inside and close the book around it, and all the jitter disappears.
That’s all there is to the controller. You can use it to play the game, just as you would any joypad. Start the game as usual, then start flapping the book around to get hopping.
HackSpace magazine is out now
The latest issue of HackSpace magazine is out today and can be purchased from the Raspberry Pi Press online store. You can also download a copy if you want to see what all the fuss is about.


Code the Classics is available from Raspberry Pi Press as well, and comes with free UK shipping. And here’s a lovely video about Code the Classics artist Dan Malone and the gorgeous artwork he created for the book:
Code the Classics: Artist Dan Malone
No Description
Website: LINK